How to Set Up Your Seller Account on Beat22 (Step-by-Step Guide)
Becoming a seller on Beat22 is simple, but you need to set up your account properly before you can start selling beats and receiving payouts. Follow this detailed guide to complete your setup once and for all.
Step 1: Login to Your Seller Dashboard
- Go to Beat22.com.
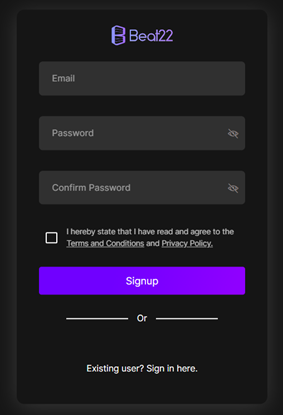
- Sign Up
Start by creating your account on Beat22.
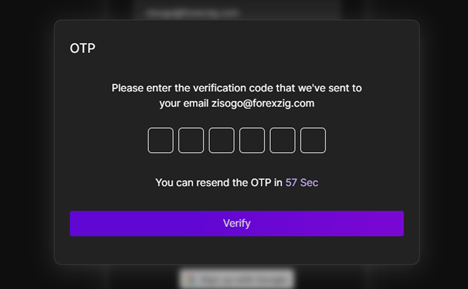
- Verify Your Email
After signing up, you’ll be asked to enter the OTP sent to your registered email. Complete this step to verify your account.
- Select Seller Option
Once your email is verified, a pop-up will appear asking if you’re a music producer. Select “Yes, I want to sell.”

- Submit Work Links
Another pop-up will then ask you to share your work links. Provide:- A link to any project or music you’ve worked on.
- Additionally, your Instagram or YouTube profile link (if available).
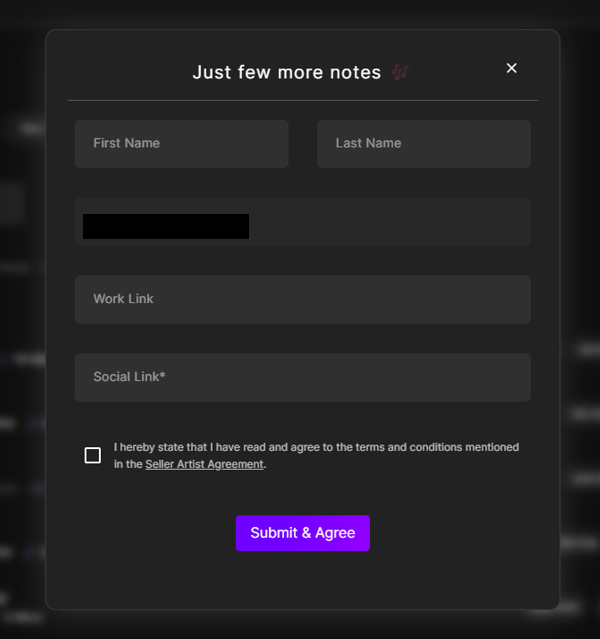
- Click Submit
After entering the details, click Submit. Your seller approval usually takes 1–3 hours. - Set Up Your Seller Account
While waiting for approval, you can start setting up your seller profile by going to Settings tab in your dashboard.

Here, you will see 5 sections on the left side:
- Account
- Payout Bank Details
- Studio Setup
- Studio Controls
- Manage Subscription
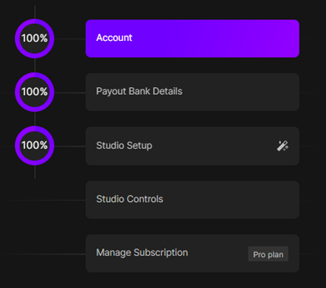
You need to complete each of these one by one.
Step 2: Account Details
Click on Account and fill in the following information:
- Under General Information:
- Verify the mobile number.
- Verify Aadhaar card. To learn to verify mobile no. and Aadhaar card: Click here
2. Under Studio Information:
- Fill in the studio name. Click here to know more
- Fill in the studio handle. Click here to know more
3. Billing Address
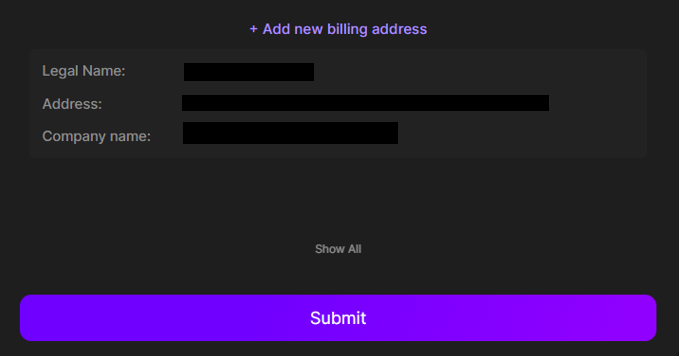
Tip: Fill everything carefully and double-check spelling. Your Studio Handle especially matters, since it will appear in your Beat22 URL (e.g., beat22.com/@yourhandle).
Step 3: Payout Bank Details
Without this step, you cannot receive payments. Go to Payout Bank Details and add:
- Account Holder’s Name (must match PAN/bank details)
- Bank Account Number
- IFSC Code
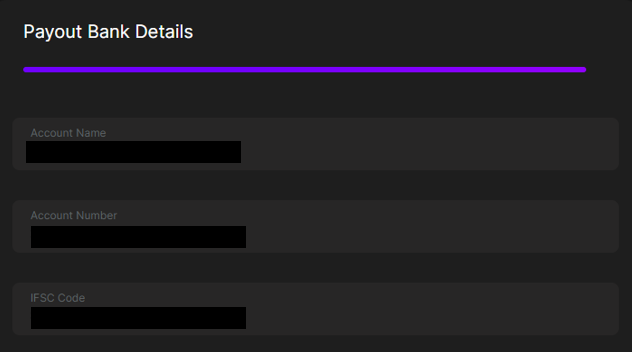
Once saved, payouts will be sent directly to your bank account within 3–5 business days of a sale.
Step 4: Studio Setup
This is where you create your public-facing profile (your “studio” on Beat22).
Fill out the following:
- Display Picture (DP): Upload a clear profile photo (1:1 ratio).
- Account Info / Bio: A short introduction about you as a producer.
- Skills Summary: List what you do – beat making, mixing, mastering, production styles, etc.
- Spotify Embed Link: If you have music released, paste your Spotify embed link so buyers can hear your work.
- Social Media Links: Add all your socials – Instagram, YouTube, SoundCloud, etc.
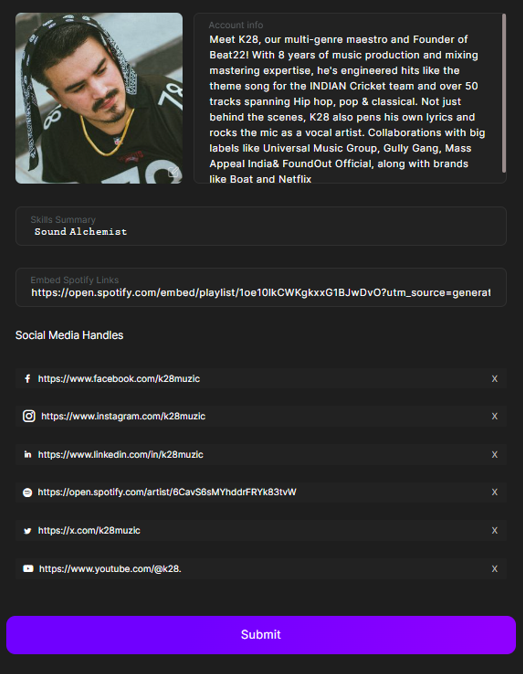
Pro Tip: Buyers trust complete profiles with links. It shows you are active and professional.
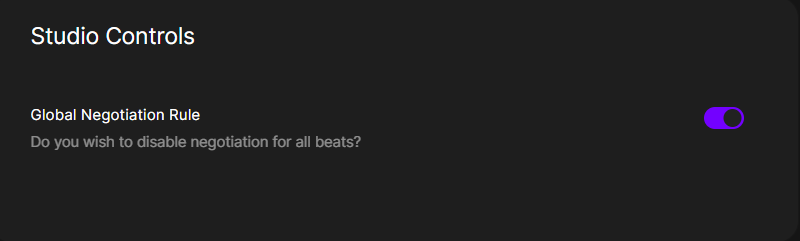
Step 5: Studio Controls
This is where you configure how your beats are sold.
- Global Negotiation Rule: Toggle this ON to enable negotiation on all your exclusive beats.
Highly recommended – this allows buyers to send you offers, making it easier to close sales.
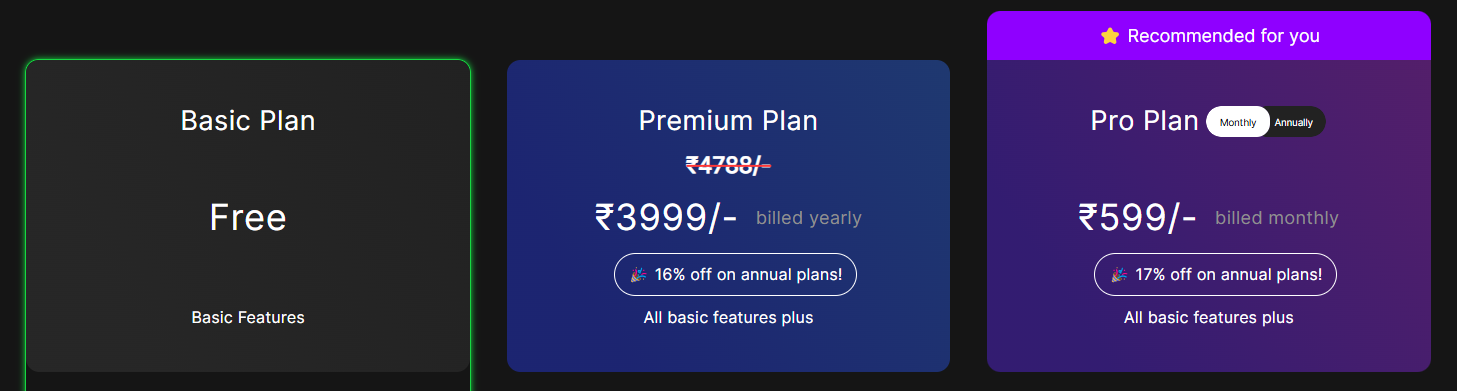
Step 6: Manage Subscription
Here you can view and manage your current seller plan (Basic, Premium, Pro Monthly, Pro Annual).
- Upgrade if you want unlimited uploads, analytics, verified badge, coupon enrollment, placements, and more visibility. Click here to learn about subscriptions
- Downgrade/cancel if needed.
Final Step: Submit for Approval
- Once you’ve completed all 5 slots – Account, Payout, Studio Setup, Studio Controls, and Subscription — your studio becomes fully functional and ready to go live.
- After finishing setup, submit your profile for approval.
- Approval usually takes 1–3 hours.
- You will receive an email notification once your account is either approved or rejected (with reasons).
- Once approved, you can immediately start uploading your beats.
Click here to learn how: How to Upload Beats on Beat22
Remember: The more complete and professional your setup, the more buyers will trust you and purchase your beats.
(DISCLAIMER: Beat22 does not legally represent any producers, sellers, and artists via this Platform. Beat22 is only recommending license terms as per universally acceptable industry practices. You are advised to consult with independent legal counsel before licensing any music and/or entering any transaction via Beat22 Platform.)